Quantcast
Channel: BatchPatch – The Ultimate Windows Update Tool
Viewing all 261 articles
Browse latest View live

BatchPatch Authentication in Domain and Workgroup (non-domain) Environments

$
0
0

When we set out to create BatchPatch, one of our primary concerns was to ensure that the software would be as easy to use as possible. We believe we were successful in that endeavor. However, since every network environment is unique, there are a few things that need to be understood about the BatchPatch authentication process in order to maximize your odds of smooth patching. In particular, the requirements to make BatchPatch work in a Windows workgroup environment are slightly different than the requirements for a domain environment.

BatchPatch Runner Account Must Be A Member Of The Local Administrators Group On All Target Computers

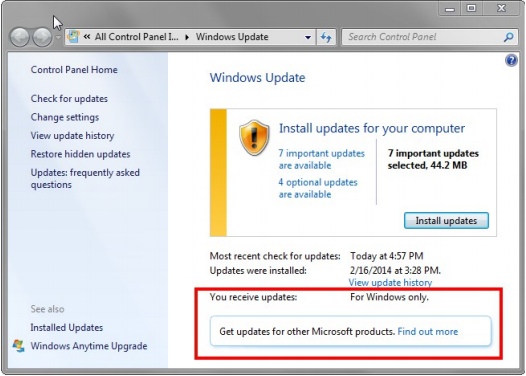
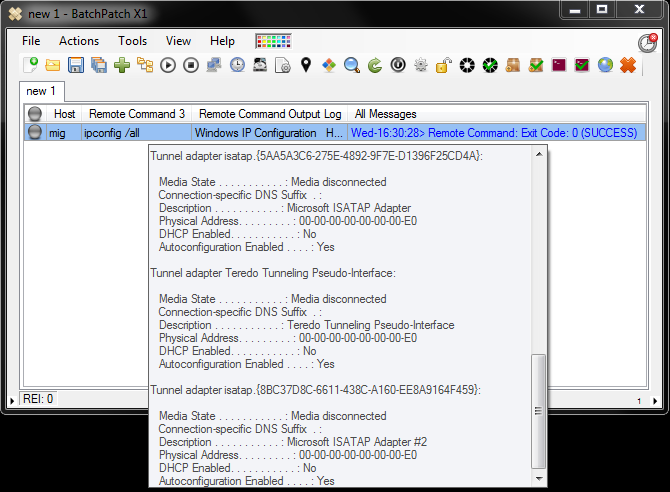
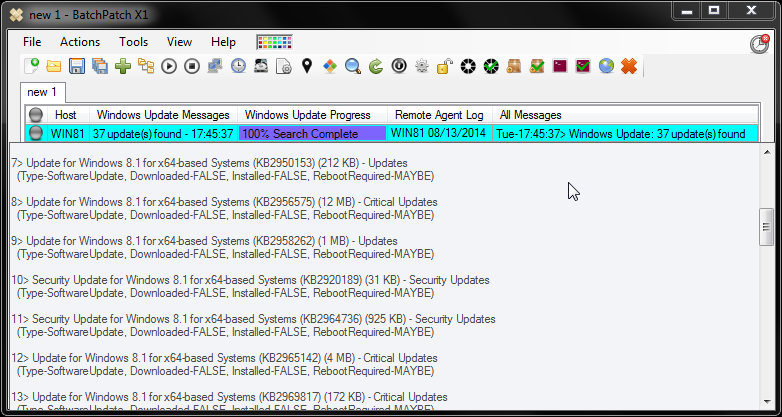
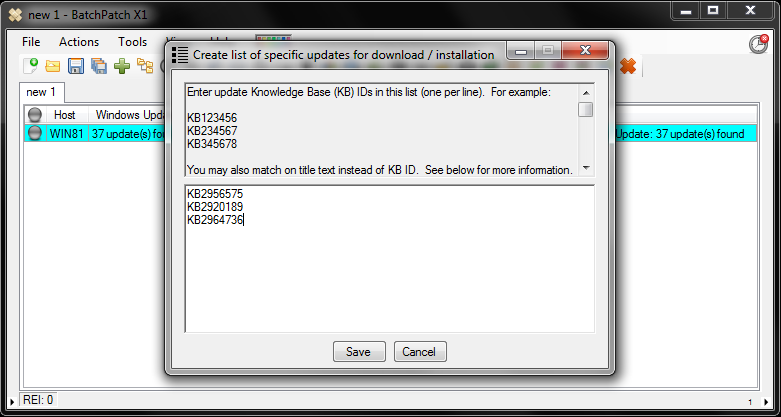
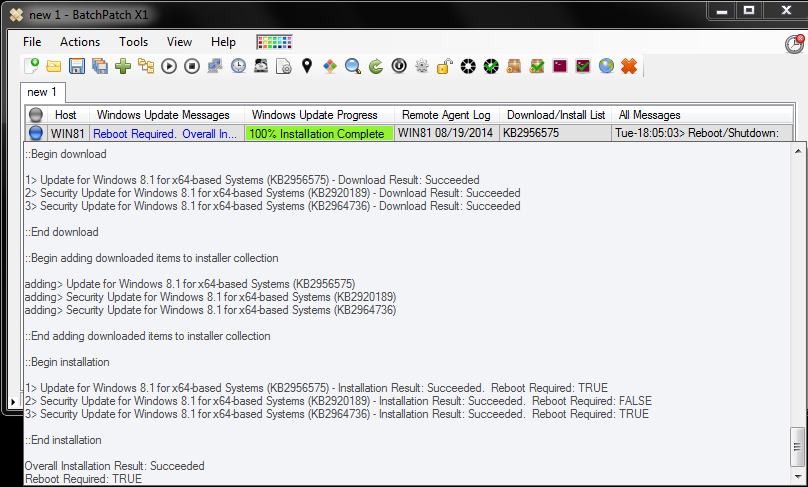
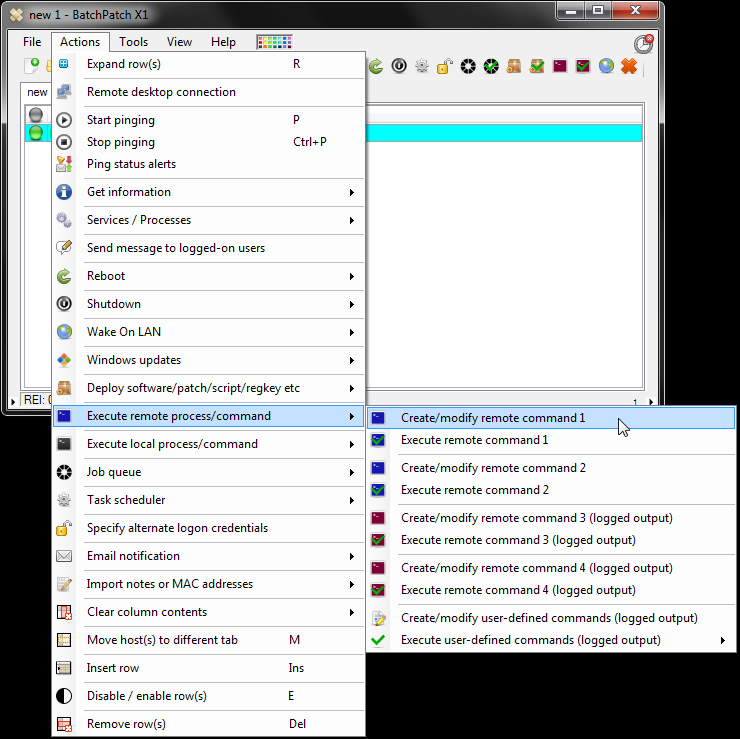
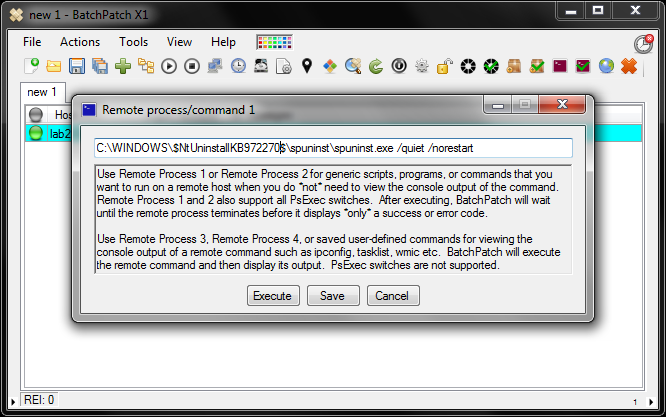
One of the most common use cases of BatchPatch is to remotely trigger the download and/or installation of Windows Updates on a network of computers. In order to do this, the account that you use to initiate the BatchPatch process must have local administrator privileges on the the target computers. To add a user to the local administrators group on a group of computers you must either log on to each computer individually to add the account, or you may use Group Policy (recommended) to apply the appropriate group membership to all computers at the same time.
LocalAdministratorsGroup
You have three options for executing BatchPatch actions under the security context of the selected user account. Any of these options will work, but we recommend option number 1. Use option 1 unless you have a strong reason not to. If option 1 isn’t viable in your environment, use option 2. If option 2 also isn’t viable in your environment, then use option 3. However, not that Option 3 is the least desirable because when you specify ‘alternate credentials’ in BatchPatch, the account username and password for each host/row in the grid will be sent across the network to the target computer in clear text. In modern switched networks, this doesn’t necessarily pose a huge risk, but it’s something that all administrators should be aware of nonetheless.

  1. Recommended Method: Log on to the computer that you will use to run BatchPatch with the user account that you have added to the local administrators group on the target computers
  2. Launch BatchPatch using right-click run-as to run BatchPatch with the user account that you added to the local administrators group on the target computers. This method can be used in cases where you are not logged on to Windows with the user account that you have setup to use with BatchPatch.
  3. Launch BatchPatch with any account, and then inside of BatchPatch enter ‘alternate credentials’ for each of the hosts that you add to the BatchPatch grid. The ‘alternate credentials’ that you specify will, of course, be the user account that you previously added to the local administrators group on the target computers.
  4. BatchPatchAlternateCredentials


    Additional BatchPatch Authentication Details:

Using Integrated Security with a Domain Account:

  1. The domain account that you use to launch BatchPatch must be a member of the local administrators group on the target computer.


Using Integrated Security with a Local Account:

  1. The local account that you use to launch BatchPatch must also exist on the target computers, defined with the exact same username and password that is defined on the computer running BatchPatch.
  2. If the local account you are using to run BatchPatch is THE built-in administrator account on the target computers, the following registry DWORD must be set to 0 on the target computers. When this DWORD is set to 0, the built-in administrator account is set to full-token mode, and BatchPatch will work properly. However, if it’s set to 1, the built-in administrator account is put in admin-approval mode, which will prevent most BatchPatch actions from completing successfully for those target computers:

    HKLM\SOFTWARE\Microsoft\Windows\CurrentVersion\Policies\system\FilterAdministratorToken
  3. (Only required for Vista/7/8/2008/2008R2/2012/2012R2. NOT required for XP/2003)

  4. If the local account you are using to run BatchPatch is not THE built-in administrator account on the target computers, but instead is just a regular named local account that is a member of the local administrators group on the target computers, then the following registry DWORD must be set to 1 on the target computers:

    HKLM\SOFTWARE\Microsoft\Windows\CurrentVersion\Policies\system\LocalAccountTokenFilterPolicy
    (Only required for Vista/7/8/2008/2008R2/2012/2012R2. NOT required for XP/2003)


Using Alternate Credentials with a Domain Account:

  1. The account that you specify must be a member of the local administrators group on the target computers.


Using Alternate Credentials with a Local Account:

  1. The account that you specify must be a member of the local administrators group on the target computers.
  2. If the local account that you specify is THE built-in administrator account on the target computers, the following registry DWORD must be set to 0 on the target computers. When this DWORD is set to 0, the built-in administrator account is set to full-token mode, and BatchPatch will work properly. However, if it’s set to 1, the built-in administrator account is put in admin-approval mode, which will prevent most BatchPatch actions from completing successfully for those target computers:

    HKLM\SOFTWARE\Microsoft\Windows\CurrentVersion\Policies\system\FilterAdministratorToken
    (Only required for Vista/7/8/2008/2008R2/2012/2012R2. NOT required for XP/2003)
  3. If the local account that you specify is is not THE built-in administrator account on the target computers, but instead is just a regular named local account that is a member of the local administrators group on the target computers, then the following registry DWORD must be set to 1 on the target computers:

    HKLM\SOFTWARE\Microsoft\Windows\CurrentVersion\Policies\system\LocalAccountTokenFilterPolicy
    (Only required for Vista/7/8/2008/2008R2/2012/2012R2. NOT required for XP/2003)

Using BatchPatch to Execute a Custom Script to Retrieve the Count of CPU Sockets, Cores, and Logical Processors from Remote Computers

$
0
0

One of the cool things about BatchPatch is that you can use it with your own scripts to retrieve information from many target computers. For the sake of this blog posting, let’s look at an example where an administrator wants to retrieve the count of CPU cores from his/her target machines.

Let’s start with the script. In this case I’ve written a vbscript to retrieve the count of CPUs by socket, core, and logical processor. First let’s take a look at the script, and then below I’ll show you how to execute the script from within BatchPatch.

Here is a what it looks like when we run the script manually from the command line:

CommandPromptCPUCoreCountOutput

Here is the actual script:

Download CPUCoreCount.vbs

1
2
3
4
5
6
7
8
9
10
11
12
13
14
15
16
17
18
19
20
21
22
23
24
25
26
27
28
29
30
31
32
33
34
35
36
37
38
39
40
41
42
43
44
45
46
'Gets the number of CPU Sockets, Cores, and Logical Processors.  Cocobolo Software LLC April 2014.
'usage: cscript.exe CPUCoreCount.vbs COMPUTERNAME

strComputer = WScript.Arguments(0)
 
on error resume next
Err.Clear
 
'strComputer = TextBox.value 'InputBox("Enter the Computer Name or IP address")
Set objWMIService = GetObject("winmgmts:\\" & strComputer & "\root\cimv2")
 
'Get OS Version for CPU info
Set colOperatingSystems = objWMIService.ExecQuery("Select * from Win32_OperatingSystem")
		For Each objOperatingSystem in colOperatingSystems
			OSVersion = objOperatingSystem.Caption
		Next
 
'Get Processor Info (note: it can take a long time to pull info from this class)	
Sockets = 0	
Cores = 0
LogicalProcessors = 0
WMISupport = 1
 
If InStr(OSVersion,"2003") or InStr(OSVersion,"XP") or InStr(OSVersion,"2000") Then
	WMISupport = 0
End If
 
Set colProc = objWMIService.ExecQuery("Select * from Win32_Processor")
	For Each objProc in colProc 
		ProcessorName = objProc.Name
		Sockets = Sockets + 1
		Cores = Cores + objProc.NumberOfCores
		If Err.Number <> 0 Then
			Cores = Err.Description
			Err.Clear
		End If
		LogicalProcessors = LogicalProcessors + objProc.NumberOfLogicalProcessors
	Next
 
If WMISupport = 0 Then
	LogicalProcessors = Sockets
	Sockets = "Property is not supported for this OS"
	Cores = "Property is not supported for this OS"
End If	
 
wscript.echo("Sockets: " & Sockets & vbCrLf & "Cores: " & Cores & vbCrLf & "Logical Procs: " & LogicalProcessors)

Using ‘Local process/command’ vs ‘Remote process/command’

BatchPatch has the ability to execute scripts locally on the computer that runs BatchPatch, or remotely on the target computers themselves. Depending on the needs in a particular situation, we decide which option makes more sense. In this particular case, if you take a look at the above vbscript, you can see that the script actually takes a target computer name as an argument. Since this script is able to give us information about remote computers without having to run it directly on remote computers, we will simply choose to execute it locally on the machine that runs BatchPatch, and we’ll pass our target computer names to the script so that we can retrieve information about those target computers. However, if the script were only able to retrieve information about the local computer without having the built-in capability of querying remote computers, then we would instead use BatchPatch to execute the script remotely on the target computers.

So, to be very clear…

  • If a script has built-in capability to query remote computers, then the script should be run on the local computer that runs BatchPatch using Actions > Local process/command.
  • If the script does NOT have built-in capability to query remote computers and it can ONLY retrieve information about the local computer that its being executed on, then the script must be executed remotely on each target computer using Actions > Remote process/command.

To execute the CPUCoreCount.vbs script using BatchPatch:

  1. In BatchPatch, highlight the target computers and select Actions > Local process/command > Create/modify local command 1
    BatchPatchLocalProcessCommand0
  2. Enter the actual local command/process. Note that because our script accepts a computer name as the first/only argument, we specify the $computer as our argument. When BatchPatch sees $computer it knows to substitute the actual computer name from the Hosts column. This way we are able to execute the local script one time for each machine in the grid.
    BatchPatchLocalProcessCommand1
  3. Now to execute the script, highlight the target computers and select Actions > Local process/command > Execute local command 1
    BatchPatchLocalProcessCommand2
  4. Finally, let’s examine the output. We have the option to either look at each computer’s result individually by middle-clicking on the cell that contains the output, or we could export an HTML report (File > Export), or we could even just copy and paste the grid contents into a spreadsheet program such as Microsoft Excel if it needs to be customized before presenting.
    BatchPatchLocalProcessCommand3
    BatchPatchLocalProcessCommand4

BatchPatch May 2014 – New Build Released

$
0
0

Hey everyone! I’m happy to announce that we just published a new build. Listed below are some of the new features:

Host Status Audio and Email Alerts

BatchPatch will now produce optional audible alerts and/or email alerts when hosts go offline or come online. Alerts are only triggered while a host is actively being pinged in BatchPatch.

((NOTE: In case you forgot or weren’t already aware, BatchPatch’s Task Scheduler is capable of performing an action or sending you an email when a host comes online, and this functionality is independent of the pinger. So, if you have users who rarely seem to have their laptops online and you want to catch them with a quick Windows Update or software deployment as soon as they put their laptops on the network, use the Task Scheduler feature instead of the Pinger’s Host Status Alerts feature.))

For the Pinger Host Status Alerts, you may select your own .WAV files or just use the built-in sounds. Additionally, while you can configure a default setting for all new rows, you still have the ability to control each host’s alert settings in the event that you only want some hosts to create alerts. There’s a new image column to show the configuration of each row, and of course there are a couple new forms to actually configure the per-row and default settings.

HostStatusAlerts

Host Status ‘Online’ and ‘Offline’ Status Logging

BatchPatch now conveniently logs changes in a host’s status to the ‘All Messages’ column. The host must be actively pinged in BatchPatch in order for this logging to occur. So, for example if you select a handful of computers to remotely install Windows Updates and reboot automatically, it will be easy to determine from the ‘All Messages’ column exactly what time the hosts go offline and come back online.

New BatchPatch Template (.bpt) and BatchPatch Project (.bpp) File Types

The original BatchPatch file extension is .bps (BatchPatch State). This is the type of file that you get when you save a BatchPatch grid. A lot of our users need the ability to easily load multiple grids that contain the same information. With the new BatchPatch Template (.bpt) format, you can create a single .bpt file and then load it multiple times to create multiple identical tabs in an instance of BatchPatch. BatchPatch won’t let you save over a template file, so when you click the save button you’ll be prompted to save a new .bps file for the grid. You can create your own .bpt files by simply renaming existing .bps files, or you can use the File > Generate template file (.bpt) menu option to create a .bpt file from a BatchPatch grid.

BatchPatch Project (.bpp) files are simple text files that can be used to launch multiple .bps or .bpt files simultaneously. Instead of launching BatchPatch and dragging 5 .bps files onto the grid, you can now alternatively create a single .bpp file that contains the full filepath of each .bps or .bpt file that you want to load. For example, you might have a 4-line .bpt file with contents that look like this:

C:\myBpsFiles\computerList1.bps
C:\myBpsFiles\computerList2.bps
C:\myBptFiles\templateList1.bps
C:\myBptFiles\templateList2.bps

As long as the file is saved with a .bpp extension (instead of .txt), BatchPatch will treat it as a BatchPatch Project file. Any time you launch a .bpp file, all filepaths in the .bpp file will be launched in the same BatchPatch instance. You can create your own .bpp files, or you can have BatchPatch create them for you with the File > Generate project (.bpp) menu item.

Load Previous Session’s Tabs on Launch

Many of you have asked for the ability to automatically load the previous session’s tabs when launching a new instance of BatchPatch. This is now available under Tools > Settings > General > Startup Options.

Opt-in to or Opt-out of Microsoft Update (for receiving other non-Windows Microsoft products through Windows Update in unmanaged environments)

For computers that are not managed by a WSUS or other update server, selecting this action is equivalent to launching the Windows Update GUI on a target computer and clicking the option to “Get updates for other Microsoft products.” This action only needs to be performed one time. Once completed, the Windows Update GUI will display a label that says “You receive updates: For Windows and other products from Microsoft Update.”
MicrosoftUpdate_Opt-in
MicrosoftUpdate_Opt-out

Grid Performance Improvements

Just as it sounds, grid performance is greatly improved now when dealing with large amounts of data in each cell. In particular, the ‘Remote Agent Log’,’All Messages’, and ‘Event Log Viewer’ columns can sometimes contain significant amounts of data relative to the other columns. In previous versions of BatchPatch when any/all of these 3 columns contained a lot of data, scrolling around and highlighting rows in the grid would be sluggish. That problem has been fixed and shouldn’t occur anymore.

Force Pinger to Use IPv4 Addresses

You no longer have to suffer with seeing IPv6 pings! Previous versions of BatchPatch would ping whatever address could be obtained for a given host, with no preference given to IPv4 over IPv6. In some environments this created a bit of pain, so you can now force BatchPatch to use IPv4 addresses. This setting is available under Tools > Settings > General.

Bug Fixes and Other Minor Updates

And of course a software update wouldn’t be a software update if it didn’t contain bug fixes!! :) There are a number of minor bug fixes in this month’s release along with other tweaks, changes, and updates not mentioned above.

Getting Started with BatchPatch

$
0
0

If you just downloaded BatchPatch for the first time, let’s go through the things that you need to have in place for the software to function properly.

  1. PsExec: Download PsExec from Microsoft
    1. PsExec needs to be placed in your Windows PATH. The PATH is an environment variable that controls where Windows searches for an executable that is specified at the command line. We recommend that you simply put PsExec.exe in C:\Windows because the Windows directory is included in the PATH when Windows is installed. You can read more about the PATH here: https://en.wikipedia.org/wiki/PATH_%28variable%29.
    2. Open a command prompt (start > run > cmd) and launch PsExec one time by typing ‘psexec’ without the quotes, and then press enter. Accept the End-User License Agreement for PsExec.
  2. Permissions: In order for BatchPatch to work properly, you must have access to a user account that is in the local administrators group on the target computers that you will be working with. In your environment, this might be as simple as logging on to your computer as a domain administrator, and then simply running BatchPatch. However, for more details on authentication requirements in BatchPatch, please take a look at the following blog posting: https://batchpatch.com/batchpatch-authentication-in-domain-and-workgroup-non-domain-environments
  3. Firewalls: In order for BatchPatch to communicate with target computers, firewall software on the target computers either needs to be disabled altogether, or it needs to be configured to allow the appropriate services to be able to communicate. For more information on using BatchPatch with Windows Firewall, please see this link: https://batchpatch.com/using-batchpatch-with-windows-firewall, and then on the target machines, verify that the following items are working:
    1. The Workstation service is running (check using services.msc by going to start > run > services.msc)
    2. The Server service is running (check using services.msc)
    3. The Remote Procedure Call (RPC) service is running (check using services.msc)
    4. The Windows Management Instrumentation (WMI) service is running (check using services.msc)
    5. The Admin$ share is available (go to start > run > \\targetComputer\admin$ to test this connection)
    6. The Windows Network is running and Printer and File Sharing are activated (no need to actually share anything)
    7. It may be necessary to open ports 135 and 445 on your target machines to allow incoming traffic from your local machine that’s running BatchPatch. However, if you follow the instructions outlined in the above-mentioned link for using BatchPatch with Windows Firewall, this should already be handled as part of those instructions
  4. Lastly, if you are using WSUS, here are some guidelines for Group Policy settings that you might want to incorporate to get the most out of BatchPatch. WSUS is NOT required to use BatchPatch. Additionally, if you DO use WSUS, no special configuration is required. BatchPatch will work with your existing WSUS environment. Additional guidelines for integrating WSUS and Group Policy for BatchPatch
  5. Once you have everything in place, you can simply launch BatchPatch and add some computers to the grid!
  6. BP_GettingStarted

PsExec v2.1 – All Network Communication Is Now Encrypted

$
0
0

Hey Everyone – I just wanted to take a moment to announce to anyone who hasn’t already heard that PsExec, starting with version 2.1, which was released on March 7, 2014, now encrypts all communication between local and remote systems. No more passwords sent in the clear!

In previous versions of PsExec, if you specified credentials with the -u and -p parameters, those credentials would be transferred to the remote systems in clear, unencrypted text. Note that this did NOT apply to cases where Integrated Security was used (remember that with Integrated Security, the security context of the logged on user is used, so no separate credentials are specified). It only applied to the cases where you supplied alternate credentials.

BatchPatch supports the latest PsExec v2.11, so please go ahead and make sure you update your copy. You can download PsExec from http://msdn.microsoft.com/en-us/library/bb897553.aspx

PsExec_Usage


Additional Information About Hubs, Switches, and Encrypted Network Communications

While it’s definitely great news that PsExec now encrypts its network communications, for those of you who might not fully understand the ramifications of what this means, I’ll explain in a bit more detail. Sending passwords over the network in clear text sounds pretty bad, doesn’t it? Well, it’s actually not necessarily all that bad, in reality.

First let’s clarify the difference between a hub and a switch. This is critical to understanding the security ramifications of sending data over the network without encrypting it.

HUB: A hub is essentially a network repeater. It’s not an “intelligent” device, per se. Any data that is sent from any port on the hub is then repeated to all other ports on the hub. This means that every port on the hub will receive (see) the same data that all the other ports see. Aside from being very inefficient, it also doesn’t provide any degree of security for the data that moves through it.

Imagine a 24-port hub with your computer connected to port 1, your target server connected to port 24, and then 22 other computers connected to the other ports on the hub. If your computer sends data to the target server on port 24, all other computers will see that data. In the event that you send a plain-text password to the target computer, if the machine plugged into port 7, for example, is setup to capture all of the data that it sees on its port, it will actually capture your password, even though your password is intended for the server on port 24.

SWITCH: Unlike a hub, a switch is a smart device. The switch actually learns what devices are connected to each of its ports, and it maintains a table to keep track of this information. When data is sent through the switch, the switch looks at the individual packets, and it forwards each packet only to the port or ports that the data is destined for. Not only is this much more efficient, but it also provides some security for the actual data.

Imagine a 24-port switch with your computer connected to port 1, your target server connected to port 24, and then 22 other computers connected to the other ports on the switch. If your computer sends data to the target server on port 24, NO other computers attached to the switch will see that data. In the event that you send a plain-text password to the target computer, if the machine plugged into port 7, for example, is setup to capture all of the data that it sees on its port, it will NOT capture your password. This is because a switch will send your data directly to port 24 without broadcasting it to all the other ports on the switch.

CONCLUSION: Since it’s now 2014, the very large majority of networks are built on switches, with very little or no use of hubs whatsoever. With regard to credentials being sent across a network in clear text, it’s not necessarily all that big of a deal when you’re dealing with a modern switched network. A malicious user wouldn’t simply be able to plug a device into an open port on the switch in order to be able to capture the data sent to all other ports on the switch. To be clear, we generally recommend using encryption whenever possible. However, the point is that it’s always important to understand the nature of the problem you have so that you can best determine how to solve it or work around it. The clear-text credentials problem on a switched network is, for many network administrators, not necessarily the biggest problem. It depends on the particular network’s physical setup, the security requirements of the company that operates the network, as well as numerous other factors.

Remotely Install Windows Updates – A Guide To Updating Your Computers Remotely

$
0
0

It’s not necessarily as straightforward as it seems like it might be to remotely install Windows updates. Windows Server Update Services (WSUS) provides a significant amount of help with this process, but there are still a number of important considerations to keep in mind.

The great news about WSUS is that it’s free to use and easy to install and configure. With this step-by-step guide, the entire installation and configuration process can be completed in about 30 minutes.

The purpose that WSUS serves is to download from Microsoft all of the updates that your network of computers requires. Your computers are then able to retrieve updates from your local WSUS server rather than each individual computer having to connect directly to Microsoft. Aside from saving bandwidth, this means that your computers do not need direct access to the internet, so long as the WSUS has access. In more and more environments where security is important, disabling internet access for servers is becoming increasingly common. Additionally, WSUS gives you the ability to more easily approve or decline specific updates or groups of updates for your entire environment, thereby simplifying the overall management process. Lastly, WSUS provides some reporting functionality to help you stay up to date and keep in compliance with the security guidelines your organization follows.

The typical way that WSUS is used is with Group Policy. An administrator can configure Group Policy to control how often computers check for updates, download new updates, and install updates. The Windows Update section of the Group Policy Editor is pictured below.

GroupPolicyEditor_WindowsUpdate

The WSUS model can be seen as a kind-of “pull” model, whereby the individual machines check-in with the WSUS at a set interval (also configured in Group Policy) to retrieve and/or install available updates.

But what if you need a higher degree of control in your environment? What if the “pull” model isn’t enough for you, and in order for you to effectively do your job you need “push-install” capability with real-time monitoring? That’s where BatchPatch shines! BatchPatch is an agentless application designed to be extremely simple and effective for administrators to remotely install Windows updates in their environments on any number of computers, whether it be just 50 hosts or as many as 1000. BatchPatch provides administrators with real-time control over the Windows update process. Install Windows updates remotely, on-demand, at the touch of a button, on all of your computers simultaneously. You can watch their progress in real-time as they search for, then download, then install available updates. And of course we all know that virtually every Windows update requires a reboot to complete the installation. Don’t worry, BatchPatch handles that too, automatically. Not only are you able to optionally include an automated reboot or shutdown, but you also have the ability to filter which updates are installed, install individual update packages instead of groups of updates, install third party software, wake on LAN, remotely execute scripts, and retrieve all sorts of information from target computers like registry values or configuration settings. The possibilities are virtually limitless.

The best news of all is that BatchPatch is free to try. The evaluation version is fully functional, only limiting the number of hosts that can be acted upon simultaneously. Even if you don’t have need to remotely install Windows updates, BatchPatch offers plenty more features. If you’re looking for a tool to help manage your entire network of computers, I would encourage you to give it a try. We are confident that once you test it out you’ll wonder how you ever got along without it. More and more sysadmins are adding BatchPatch to their collection of must-have systems management applications.
BatchPatch

Wake On LAN with BatchPatch

$
0
0

BatchPatch provides Wake On LAN (WoL) capabilities, which makes it convenient when you need to remotely power-on (wake) computers on your network. Some folks like to use Wake On LAN in conjunction with their routine maintenance for patching / updating their computers. The reason this can work nicely is because once you have Wake On LAN configured for your computers, you’ll be able to patch them even if they are powered down when your maintenance window begins. With Wake On LAN you’ll be able to remotely power-on the computers, initiate the patching process, and then optionally shut them down again after completing the maintenance. Note, Wake On LAN needs to be enabled in two places before it will work. Below we will explain how to enable it in both the BIOS and in Windows.

Enable Wake On LAN in the BIOS


To access the BIOS on a computer, you’ll need to restart the computer while sitting watching the console. During the setup phase, you should be prompted to enter the BIOS by pressing a hotkey on your keyboard. For many BIOS manufacturers this is F1 or Delete, but it could be any key. Read what is displayed on your console and follow directions to enter the BIOS or SETUP. If you’re unable to proceed, consult the documentation for your computer hardware from the manufacturer.

Once you’ve entered the BIOS / SETUP for your computer, go to the power management section. You need to find the entry for WOL, Wake-up, PME (Power Management Events) or similar. Enable the setting. The AMC BIOS page for Wake On LAN is shown below under “PME Event Wake Up.”
PME_Event_Wake_Up


Enable Wake On LAN in Windows


Now that you’ve enabled Wake-on-LAN in the BIOS, you must also enable it in Windows. Launch the ‘Network Connections’ screen by opening the ‘Control Panel > Network and Sharing Center > Change adapter settings’ screen. You can also get to this screen by clicking ‘Start > Run,’ and then type “control netconnections” without the quotes.
NetworkConnections
From here, right-click on your ‘Local Area Connection’ and select “Properties.”
LocalAreaConnectionProperties
In the Local Area Connection Properties window click the “Configure” button. You’ll be presented with all of the configuration options for your network adapter. In the “Advanced” tab, find the option for Wake-on-LAN. This might be presented as “Magic Packet” or similar. Use your judgement to determine the correct setting since different network adapter drivers will present it slightly differently. In the screenshot below you can see that my computer lists it as “Wake on Magic Packet.”
WakeOnMagicPacket


Adding MAC addresses to the BatchPatch Grid


Now that you’ve configured your computer to wake when it receives the “magic packet,” you’re ready to use BatchPatch to initiate the wake-on-LAN process. The MAC address of the target computer is required for Wake-on-LAN, and you have a couple different ways to get it into the BatchPatch grid.

Option A:
Load the target host name into the grid and then retrieve the MAC address by using the “Get Information > Get MAC Address” option. Note, that under certain conditions if a machine has many MAC addresses with multiple active network adapters, it’s possible that BatchPatch will retrieve a MAC address for an adapter that is not on the network that you expect. In this case you might have to revert to Option B.

Option B:
Load the target host name WITH its MAC address by using the following syntax in the “Add Hosts” dialog:
targetHost1#1B6C65E5541D
targetHost2#1A5D27F3451B
targetHost3#1C4B38C2214C
BatchPatchAddHostsWithMACs
BatchPatchX3


Sending the Magic Packet


Now that you have your hosts and MACs loaded into the BatchPatch grid, you’re ready to send the magic packet to wake the target machines. Highlight the hosts and go to Actions > Wake on LAN.
BatchPatchWakeOnLANMagicPacketsSent

BatchPatch Performance Tuning

$
0
0

Hey everyone! This week I’d like to take some time to talk about getting the most out of BatchPatch from a performance perspective. As you have probably already discovered, BatchPatch is geared toward doing a lot of things at once. One of the most important design elements for us was to figure out a way to allow the user to execute a lot of tasks in a very small amount of time. We didn’t want to bog down the user interface with a lot of extra windows requiring lots of clicks to get the software to do your bidding. We wanted to keep things simple, intuitive, and fast, while still being very powerful for getting the job done effectively.

We know that the large majority of BatchPatch users are highly skilled technical wizards (frequently referred to as sysadmins) who really know what they’re doing when it comes to computers and networking. We like to think of ourselves as more than just average power users, and we wanted BatchPatch’s interface to be driven as much as possible by function, giving the user as much control as possible, rather than dumbing-down the interface at the cost of functionality. We know as well as you do that there’s nothing more annoying than a clunky app that shields the user from the core functionality of the app so much that it begins to feel like you’re not driving the app, and instead the app is driving you.

There were a number of trade-offs that we made during the development process, always bent toward providing the user with maximum control, even if it meant that in some cases the user could dig him/herself into a performance bottleneck. For example, BatchPatch allows you to execute actions such as remotely installing Windows Updates, remotely installing software, or remotely executing scripts on an unlimited number of machine simultaneously. The awesome thing about this is that tasks can be accomplished extremely quickly since BatchPatch can be configured to allow a very large number of execution threads to run concurrently. The downside is that if you attempt to execute more simultaneous threads than the computer or network connection is able to gracefully handle, you could end up causing the computer to stutter a bit in its responsiveness while it completes all those tasks.

I know for myself that I don’t want to be limited by some over-protective factory setting that isn’t changeable. We we believe that our super-savvy users should have the final say over how the app runs rather than being limited to settings geared for less savvy users. One area where this holds true is with maximum thread count. BatchPatch is a multi-threaded app that takes advantage of the capability of modern processors to run numerous different execution threads simultaneously. In fact, if you happen to watch the ‘Threads’ column in the ‘Process’ tab of Windows Task Manager when you execute an action across a large number of hosts in BatchPatch, you’ll see that BatchPatch might quickly spin up many more threads than any other app running on your computer. Of course once the action completes those threads are released back to the OS.
TaskManager_BatchPatch

In the Tools > Settings window, we provide an option called “Concurrent Thread Maximum.” The default value is set to 100, but you can choose any number you like, with 0 being an unlimited number of threads. The concurrent thread maximum value is used to control the number of worker threads that will execute concurrently. If you execute a set of actions simultaneously on more computers than the concurrent thread max value is set to- so for the sake of this example let’s imagine executing a remote Windows Update installation on 200 computers when the concurrent thread max is set to 100- you’ll notice that the first 100 rows begin execution immediately while the second 100 rows show a status of ‘Queued.’ As computers in the first 100 rows complete their actions, their threads are freed up for the queued rows to begin executing.
ConcurrentThreadMaximum

If you’re running BatchPatch on a computer that doesn’t have a lot of CPU power and/or RAM you might want to decrease the concurrent thread max. If your computer has a lot of horsepower, you might consider increasing the concurrent thread max or even removing the limit altogether by setting it to 0. It’s your choice.


BatchPatch – New Build Released July 2014

$
0
0

Hey everyone! We published a new build today, and I wanted to take a moment to share with you some of the updates that have been made. While this build was primarily a bug-fix release, we also included a few features worth noting. In particular, we’ve added some reporting options for Windows Update history, which many of you have been asking for!

Consolidated Windows Update History Reports

You asked for it and now you’ve got it! Windows Update history can be viewed very easily now using the report history option. To generate an update history report, add hosts to a BatchPatch grid and then highlight the hosts that you want to include in the report. Next, click Actions > Windows Update > Consolidated report of update history. This will launch the Update History Report settings form. From there, select the options you want and click Generate Report. More info on this feature is available here.

BatchPatch_ConsolidatedUpdateHistoryReport

Consolidated Update History Report Output

Exclude Specific Columns from Being Automatically Unhidden by BatchPatch

This minor addition makes it easier to customize BatchPatch so that it displays only what you want it to display. By default, when an action is executed in BatchPatch, BatchPatch automatically opens any column that is written to by the action. However, there are times where you might not want to ever see certain columns, and now it’s easy to exclude them from auto-unhide operations.

ExcludeColumnsFromAutoUnhide

New Row Index Column

A number of you have asked for a Row Index column to help keep track of your hosts. This has now been added, but it’s hidden by default. If you want it to be displayed at all times, simply untick the ‘#’ box in the “except these columns” form mentioned above.

RowIndexColumn

New Build Downloads Now Accomplished In-App

Some of you have had problems downloading BatchPatch from the “New Build Available” form using “Help > Check for updates.” These problems occur as a result of IE security settings. While it’s simple enough to whitelist http://batchpatch.com in the security settings to resolve the issue, we modified the code to now execute the download process inside of BatchPatch instead of launching the default web browser, which should ease some of the pain and confusion when updating your software. The web browser download will be used now only in the event of a failure of the in-app download.

UAC Elevation Code Update

Generally speaking there is no need to run BatchPatch with elevation. However, in the event that you are trying to perform actions on the computer that is running BatchPatch, as opposed to a remote target computer, BatchPatch does need to run as administrator. The code that warns you of this fact has been updated to be more accurate and robust. Previously there were certain conditions that would prevent the elevation prompt from appearing, but now BatchPatch should be better about telling you if you need to elevate.

Bug Fixes!

We fixed a number of very minor to slightly-less-minor bugs in this build. I’ve listed a few of the more notable ones below:

  • Fixed bug in Get Registry Key/Value so that quotation marks are automatically added, preventing Invalid Syntax errors
  • Fixed email notifications and HTML exports to not display Event Log, Remote Agent Log, and All Messages columns unless they are visible in the BatchPatch grid
  • Fixed bug in Remote Process/Command where WMIC commands would fail to execute under Remote Command 1/2 even though they would execute successfully under Remote Command 3/4
  • Fixed bug in concurrent thread maximum where trying to set it below the number of logical processors in the system would not change the setting at all

Create a Consolidated Report of Windows Update History

$
0
0

We have received numerous requests for the ability to create Windows Update history reports with BatchPatch. I’m happy to announced that the latest build of BatchPatch (2014.07.01) has a new reporting option that enables you to quickly retrieve the entire history of Windows Update actions from target computers. The output is consolidated so that you can look at all updates across all target computers in a single grid. This means that it’s now simple to retrieve a list of updates that have been installed on a particular computer or set of computers.

To generate an update history report, add hosts to a BatchPatch grid and then highlight the hosts that you want to include in the report. Next, click Actions > Windows Update > Consolidated report of update history. This will launch the Update History Report settings form.

BatchPatch_ConsolidatedUpdateHistoryReport

The report settings allow you to easily view just a specific date range, with the default set to show only the most recent 30 days of history. Additionally, you can choose to specify inclusion or exclusion criteria, so that only updates titles that match the text entries you provide will be included or excluded. This makes it easy to retrieve update history for only a specific update, or to exclude update history information for a particular update. Note that exclusion criteria will override inclusion criteria in the event there is a conflict when both search fields are used simultaneously. Using the inclusion/exclusion fields are completely optional. You may instead choose to simply retrieve all Windows Update history for a given date range, and then you can simply sort the report to view the information that is important to you.

The report is generated in real-time by querying each machine for information about its Windows Update history. The output includes the host name, update title, date installed/uninstalled, action performed (installation/uninstallation), status of the action performed (success/failure/in-progress), as well as the application that performed the action.

The final output is both sortable and exportable, and there is also a find feature that enables you to quickly jump to a cell that contains your search text. The export options give you the ability to create pipe-delimited, tab-delimited, or XML reports, which can then be opened in your favorite spreadsheet application or imported into a database.

Consolidated Update History Report Output

This new report feature should make it easier to monitor the status of Windows Updates on your PCs while maintaining compliance with the security guidelines of your organization. As always, if you have any questions, comments, or issues, please feel free to post a note in the forum or send us an email.

Hiding Windows Updates Remotely In a Non-WSUS Environment

$
0
0

If you’re using BatchPatch in an environment that has no WSUS server, there might be times when computers show more available updates than you actually want to install. For example, perhaps you don’t want to install new versions of IE or .NET when you’re installing Windows Updates, but you do want to install updates to the existing versions of IE and .NET. Well, if you had a WSUS server, the procedure would be as simple as removing the approval for the particular update on your WSUS server. This approval removal would then be seen by computers that report the WSUS server, and it would then no longer appear in the list of available updates on those computers. However, for those of you working in environments that do not include a WSUS server, you need a way to hide these updates. Fortunately, with BatchPatch it’s a simple process to hide specific updates, by name, so that they no longer appear as available or visible updates on target computers. In the same way that updates can be hidden, they can also easily be unhidden at any time with just a few clicks.

To hide an update on target computers using BatchPatch:

  1. First, let’s check for the list of available updates, so that we can see the titles of all the updates that are ready to be installed on the computer. Highlight the host and then select Actions > Windows Updates > Check for available updates. In the screenshot below we can see the list of updates on available on my computer at the moment.
    CheckForAvailableUpdates
  2. For the sake of this example, let’s hide the first update in the list, titled “Update for Windows 7 for x64-based Systems (KB2952664).” Highlight the hosts that you want to hide the update on and then select Actions > Windows Updates > Hide / unhide updates > Create/modify list of specific updates for hiding.
  3. In the new windows that appears, we have the option of either listing the exact title of the update or just a piece of the title. We can enter one entry per line. BatchPatch will examine the list of updates that are available, and if any of those updates contains one of these entries in the update title, the update will be hidden. Generally speaking, the simplest way to proceed is to enter the KB ID number for each update that we want to hide. However, occasionally an update title might not contain the KB ID, in which case we would simply copy and paste the exact title into the list. In this example I’ve input the KB ID of the update that we want to hide.
    CreateListForHidingUpdates
  4. Once we’ve added the update(s) to our list, we are ready to execute the action to hide the update. There are two ways to do this. We can either simply click the Execute button, which will hide the update on all selected hosts, or we can click the Save button, which will save this “Hide list” for all of the highlighted rows. Once the “Hide list” has been saved for a given row or set of row(s), to actually hide the update we would click on Actions > Windows Updates > Hide / unhide updates > Hide updates.
    HideUpdates
  5. We can see in the screenshot above that the update has been hidden. Now when we execute a new “Check for available updates,” the hidden update doesn’t appear in the list. When we install the available updates, the hidden update will not be installed. If at some point we decide that we want to view the list of installed updates and/or unhide the update, we can do so very easily by using Actions > Windows Updates > Hide / unhide updates > List hidden updates along with Actions > Windows Updates > Hide / unhide updates > Unhide updates.

    ListHiddenUpdates

How To Receive Notifications When Computers Go Offline Or Come Online

$
0
0

Let’s say you’re working through a list of computers to install Windows Update or a third-party software product, but only a percentage of the computers are actually online. The reason, of course, is because your organization provides laptops to its employees, but at any given time there are a lot of people who either aren’t in the office or are disconnected from the network for one reason or another. Wouldn’t it be nice to receive an email or hear an audio alert when the remaining, yet-to-be-updated computers come online so that you can get them updated before the users remove them from the network again? You can use BatchPatch to notify either via email or by playing a sound when a computer goes offline or comes online. Here’s how it works:

  1. Configure email settings: Launch the settings dialog by selecting Tools > Settings > Email Notifications. You’ll need to fill in the appropriate fields for your organization, which might include creating an email address specifically for the purpose of sending alerts. Once you’ve got everything filled out, make sure to verify the configuration by clicking the Test email settings button, which will send a test notification to the configured recipients.
    BatchPatch Email Notification Settings
  2. Configure default alert settings: Select Tools > Settings > Ping Status Alerts. The Global default alert settings for NEW rows section controls the default alert configuration of hosts that are added to the BatchPatch grid. However, after a host has already been added to a grid, it’s very simple to modify the settings for that particular host, which we’ll get to in a moment. For now you simply need to make sure that you’ve configured default settings for your installation of BatchPatch. For example, perhaps you love Star Wars and simply can’t help yourself from setting the online audio sound to a classic clip of Yoda speaking to Luke! Or you could opt to leave the default BatchPatch sounds as-is. I promise that no one will think less of you. :)
    PingStatusAlertSettings
  3. Configure alert settings for hosts in the grid: In your BatchPatch grid you have the option of configuring different types of alerts for different hosts. For example, you can configure some hosts to send email notifications when they come online, while having other hosts only produce audio alerts when they go offline. Highlight the hosts that you want to modify, and then select Actions > Ping status alerts. In the screenshot you can see that I’ve set host3 through host8 to only send email notifications when the host comes online. The other hosts in the grid are set to produce audio alerts when the hosts go offline or come online.
    BatchPatch Ping Status Alerts
  4. Configure email recipients for hosts in the grid: (Optional) If you want to configure specific rows in the grid to email particular administrators, you can do that by overriding the default email recipients for any particular row(s). Highlight the hosts and select Actions > Email notification > Override default email notification settings. In the screenshot I have configured host3 through host8 with ‘admin7@yourorganization.com’ as their only recipient for email alerts.
    Override email recipients
  5. Ping the hosts: The only thing left to do is start pinging the hosts in BatchPatch. Highlight the hosts and then select Actions > Start pinging. Hosts will only send email alerts or produce audible alerts while they are being actively pinged in BatchPatch. As soon as a given host’s ping changes from ‘TimedOut’ to ‘Reply from…’ you’ll receive an email notification or hear an audio alert, depending on the settings you configured for the row.

Executing Remote Commands with BatchPatch

$
0
0

One of the tasks that BatchPatch can help with is executing remote commands or processes across many computers at the same time. For systems administrators this is a common need, and our goal was to make it extremely easy to perform this task in BatchPatch. This way you can avoid manually writing a script that steps through each target computer one at a time, and instead you can use BatchPatch to execute the same command across your entire network of computers, simultaneously, in just a few seconds.

In the BatchPatch actions menu we have two different methods for executing remote commands. One method (Remote Commands 1 and 2) will simply execute the command or process and then report the exit code. The second method (Remote Commands 3 and 4) will execute the command or process and attempt to retrieve any output that the command or process created. Under the hood, the actual code used to execute remote processes differs with these two methods. As such, in some cases you may notice the behavior of the two different methods is a bit different. This is expected. In some cases it’s possible that a remote command will execute successfully under one method but not the other, though in many cases a remote command can be executed using either option. Because the process execution and parsing differs under the hood for the two methods, we’ve included both the non-logged and logged-output options to help maximize compatibility with remote commands.

We generally recommend that if you need to execute a command on a set of computers but you don’t need to see the output of the command, that you use the Remote Command 1 or 2 actions. An example command for this type of use case might be something like ipconfig /flushdns where you need to flush the DNS Resolver Cache on target computers. In that case you simply need the command to execute successfully, but the command itself doesn’t produce any output that you care to retrieve.

However, in the case where you actually need/want to see the output of a particular command, you should use the Remote Command 3 or 4 actions, which in BatchPatch are listed with “(logged output)” next to them to indicate that they will attempt to retrieve the output of any command that’s run on target machines. An example of a command you might run in this instance is ipconfig /all where you want to see the output of the IP configuration on target computers.

Executing commands remotely when you do not need to retrieve output from the command:

  1. Highlight your hosts in the BatchPatch grid and select Actions > Execute remote process/command > Create/modify remote command 1
  2. Enter your command in the new window that appears. In this example we’ll use ipconfig /flushdns
    BatchPatchRemoteCommand1
  3. Execute the command by clicking the “Execute” button. This option will actually save the command to the grid and then execute it immediately. However, if you instead choose to skip the immediate execution option and select to only save the command using the “Save” button, you can still execute it later by using Actions > Execute remote process/command > Execute remote command 1.
    BatchPatchRemoteCommand1Completion

Executing commands remotely when you need to retrieve output from the command:

  1. Highlight your hosts in the BatchPatch grid and select Actions > Execute remote process/command > Create/modify remote command 3
  2. Enter your command in the new window that appears. In this example we’ll use ipconfig /all
    BatchPatchRemoteCommand3
  3. Execute the command by clicking the “Execute” button. This option will actually save the command to the grid and then execute it immediately. However, if you instead choose to skip the immediate execution option and select to only save the command using the “Save” button, you can still execute it later by using Actions > Execute remote process/command > Execute remote command 3.
  4. You can see in the screenshot below that I’ve displayed the cell contents of the Remote Command Output Log by middle-clicking on the cell. We can see the output of the ipconfig /all command.
    BatchPatchRemoteCommand3Completion

Remotely Install Only a Subset of Available Windows Updates

$
0
0

Sometimes you might need or want to only install a specific handful (or more) of updates on remote computers, rather than installing all of the updates that are available for those computers. With BatchPatch we provide two different ways to accomplish this task. Additionally, if you prefer a video demo instead of the written tutorial below, take a look at this video demo.

Method 1:

Create a list of updates to be installed on target computers, and then execute the update installation for only the updates specified in the list.

  1. Let’s start by checking the target host(s) to see what updates are available to install. Highlight the host(s) and then select Actions > Windows Updates > Check for available updates
  2. We can see in the screenshot below that there are 37 updates available on our target host. I’ve expanded the ‘Remote Agent Log’ column by middle-clicking on it, so that we can see the list of available updates.
    CheckForAvailableUpdates
  3. For the sake of this tutorial, let’s select 3 of the available updates to install. We’ll use KB2956575, KB2920189, and KB2964736.
  4. Select Actions > Windows Updates > Create/modify list of specific updates for download/installation
  5. Copy the KB IDs for the three updates into the provided field, with one KB per line. Then save the list. We do not strictly have to use KB IDs because the update filtering is actually done by comparing the title of the update to the entries in our list. If an available update’s title contains the text of an entry in our list, it will be installed. However, generally speaking, to guarantee uniqueness in our entries, it’s always best to use KB number whenever possible so that we don’t end up installing more updates than we actually want to install. For example, if we simply entered “Security update for Windows” in the list, then any available update that has “Security update for Windows” in its title would end up getting installed, which is not what we want in this case.
    CreateModifyListOfSpecificUpdatesForDownloadInstallation
  6. Now that are list of specific updates has been saved, the last thing left to do is install the updates. I will select Actions > Windows Updates > Download and install updates + reboot if required
  7. After the task completes, we can review the ‘Remote Agent Log’ column again to see that only the 3 specific updates were installed on the target host.
    ReviewInstalledUpdates

Method 2:

Create a list of updates to hide on target computers, hide only those specific updates, and then install all remaining visible updates.

  1. In this method, instead of first selecting the specific updates that we want to install, we instead first select all of the updates that we want to exclude. Let’s start by checking the target host(s) to see what updates are available to install. Highlight the host(s) and then select Actions > Windows Updates > Check for available updates
  2. We can see in the screenshot below that there are 34 updates available on our target host. I’ve expanded the ‘Remote Agent Log’ column by middle-clicking on it, so that we can see the list of available updates.
    CheckForAvailableUpdates2
  3. In this example, let’s select 4 of the available updates to exclude by hiding. This means that after we hide 4 updates, we’ll have 30 leftover to install. Let’s hide KB2962409, KB2967917, KB2971239, and KB2981655.
  4. Select Actions > Windows Updates > Hide/unhide updates > Create/modify list of specific updates for hiding
  5. Copy the KB IDs for the four updates into the provided field, with one KB per line. We do not strictly have to use KB IDs because the update filtering is actually done by comparing the title of the update to the entries in our list. If an available update’s title contains the text of an entry in our list, it will be installed. However, generally speaking, to guarantee uniqueness in our entries, it’s always best to use KB number whenever possible so that we don’t end up hiding more updates than we actually want to hide. For example, if we simply entered “Security update for Windows” in the list, then any available update that has “Security update for Windows” in its title would end up getting hidden, which is not what we want in this case.
    CreateModifyListOfSpecificUpdatesForHiding
  6. Click on the ‘Execute’ button. The four updates in our list will be hidden on the target host, leaving the other 30 updates available. We can examine the ‘Remote Agent Log’ column once again to confirm this.
    ReviewHiddenUpdates
  7. The last step is to install all of the remaining 30 updates. We can do this by selecting Actions > Windows Updates > Download and install updates + reboot if required. Only the visible updates will be installed. The hidden updates will remain hidden indefinitely, though we can unhide them at any time in the future if we want/need to install them.

Remotely Uninstall Windows Updates From Multiple Computers

$
0
0

Over the past couple of weeks there’s been a lot of press about problematic Windows Updates causing stability issues for many users. As such, Microsoft recommends that users uninstall the offending updates. We think it’s a good idea for all users to remove these updates even if they haven’t experienced any specific issues that many users encountered as a result of installing them.

You can read more about Microsoft’s recommendations here:

The updates that should be removed are:

  • KB2982791
  • KB2970228
  • KB2975719
  • KB2975331

Using BatchPatch to Remove Individual Windows Updates, by KB ID, from Windows 7/2008R2 and newer OSes:

The good news is that BatchPatch makes it very easy to remove individual Windows Updates from multiple computers simultaneously. You may want to first scan your computers to see which ones have the offending updates installed.

The first three steps here are not absolutely necessary/required for our particular needs at the moment, but it’s good to know that we can search for update history on our machines to verify if they even have the offending updates installed in the first place, so I’ll run through what that looks like.

Optional: Scan Machines to Retrieve the List of Installed Updates

  1. Highlight your hosts in the grid, and then select Actions > Windows Updates > Generate consolidated report of update history
    GenerateConsolidatedReportOfUpdateHistoryA
  2. Select the date range that you want to include in the search. Optionally, if you’re looking for specific updates, you may enter them in the field provided, so that the results output includes only the particular updates in question. However, you don’t need to specify updates at this point and may simply search for all installed updates instead, which is what I’ve done in the screenshot below.
    GenerateConsolidatedReportOfUpdateHistoryB
  3. You can see the results for my search in the screenshot below. In this case, none of the offending updates are installed on my lab VM. However, we’ll move forward and uninstall one of the updates that is installed, so that you can see how it’s done.
    GenerateConsolidatedReportOfUpdateHistoryC

Required: Uninstall the Offending Updates:

  1. The test machine that I’m using in the lab here does NOT have any of the offending updates from a couple of weeks ago installed, so for the sake of this example I’ve selected to uninstall KB972270. When you’re removing updates from your own computer, you simply need to specify the KB ID for the update that you want to remove. Select Actions > Windows Updates > Uninstall individual update
    UninstallIndividualUpdateA
  2. Enter the KB ID that you want to remove.
    UninstallIndividualUpdateB
  3. Click ‘OK’ to proceed with the uninstallation

Using BatchPatch to Remove Individual Windows Updates, by KB ID, from Windows XP/2003:

Windows XP and 2003 do not support WUSA.exe, so we use an alternate method to remove individual updates from these older OSes:

  1. Highlight your hosts and select Actions > Execute remote process/command > Create/modify remote command 1
    UninstallIndividualUpdateRemoteCommandA
  2. The command that we execute is formatted as follows:
    C:\WINDOWS\$NtUninstallKB972270$\spuninst\spuninst.exe /quiet /norestart
    UninstallIndividualUpdateRemoteCommandB
  3. Click ‘Execute’ to proceed with the uninstallation

Remote Script Deployment – Install Multiple .MSU Files in a Single Action on Remote Computers

$
0
0

One of the common questions we receive is “How does one go about deploying and installing multiple updates to offline computers?” First, we are excited to let you know that we’ve been working on new functionality specifically designed for offline updating of detached network environments. We expect the new offline updates options to be available in approximately a month from now. While it will address the bulk of requirements that most users have for deploying Windows Updates to computers that do not have access to the internet or a WSUS server, there is still an open question of how does one go about deploying multiple .MSU files to a computer without having to do one deployment for each .MSU file.

The ‘Deployment’ feature of BatchPatch enables you to install multiple Windows Updates in the form of .MSU files (or could be any other type of installation file such as .MSI or .EXE, though most Windows Update standalone files nowadays come in the .MSU flavor) on your target computers. Below is a step-by-step tutorial:

  1. Prepare the script. In this example we are going to install 5 .MSU files in succession, with a single script that will be deployed with BatchPatch. I’ve already downloaded the 5 .MSU files from Microsoft. They are stored in a folder on my computer called “5_MSU_Files.” Additionally, I’ve created a batch file called “Install_Multiple_MSU_Files.cmd” which is included in the same directory. Note the directory contents and the script contents below:
    Install_Multiple_MSU_Files_Batch
    MSU_Files_In_A_Folder
  2. Prepare the deployment. Select Actions > Deploy software/patch/script/regkey etc > Create/modify deployment. Note that after we select the Install_Multiple_MSU_Files.cmd in the first field, we also check the box to “Copy entire directory contents in addition to the specified file.”
    Deploy_Multiple_MSU_Files
  3. Execute the deployment. When we click the ‘Execute’ button, BatchPatch will copy the script file along with the 5 .MSU files to the target computer’s working directory. BatchPatch will then remotely execute the script, which will install the 5 update files sequentially.
    Deployment_exit_code_0
  4. That’s all there is to it. As you can see, the process is actually pretty simple. Now of course when we installed these updates we used the /norestart option, so now that the script completed, we will want to finalize the installation by rebooting the target machine. We can do this using the Actions > Reboot option in BatchPatch.

BatchPatch New Build – 20140908

$
0
0

Hey guys/gals – I just wanted to inform you of the new build we posted last week. There were a number of minor bug fixes, updates to logging and error reporting, plus a few functionality enhancements. Also, note that in the next month or so we will be publishing another release with a much more significant addition that we’re really excited about. Stay tuned for more on that. In the meantime, please see below for a description of the additions in the currently published build.

New ‘Tools > Settings > Windows Update’ server selection options: Default, Windows Update, and Microsoft Update

Previously if you wanted to bypass your default/managed WSUS server to search for updates directly on Microsoft’s public server, you couldn’t specify whether you wanted to use Windows Update or Microsoft Update. However, now we’ve given you the option to use any of the 3 search locations. Note that ‘Windows Update’ includes only updates for Windows operating systems. ‘Microsoft Update’ not only includes updates for Windows operating systems but also includes updates for other non-OS Microsoft products/applications. The ‘Default/Managed’ option will tell BatchPatch to use the target computer’s existing configuration to determine where to search for updates. This means that if the target machine is configured via GPO or manually configured to search for updates on a WSUS server, then that is what will be used. Or if the target machine is configured to use ‘Windows Update,’ then that is what BatchPatch will use. We know that quite a few of you will be pleased with this addition. Note that in order to use Microsoft Update you must first “opt-in” to the Microsoft Update service. You can do this using Actions > Windows Updates > Opt-in.
Settings-WindowsUpdateOptions

New option to Restart service by name

This action is available under Actions > Services/processes. This means you no longer have to execute ‘Stop service’ followed by ‘Start service.’ Now you can simply execute ‘Restart service.’
RestartServiceActionsMenuItem

Improved logging and error reporting

We are continuing to improve the logging and error reporting to be easier to digest and more explicative.

Bug fixes and other minor updates

We’ve fixed numerous other bugs, and there are a number of other minor updates included in this release. Many of the updates will enable us to better provide upcoming functionality. We have some exciting stuff in the works for the next release, so stay tuned.

Using BatchPatch To Remotely Install Windows Updates

$
0
0

This tutorial illustrates how to use BatchPatch in its default configuration to remotely install Windows Updates on your computers. If you prefer a video tutorial, please check out this link: Remotely Installing Windows Updates – Video Tutorial.

Please review the Getting Started page as well as the Authentication Details page to get acquainted with the prerequisites for BatchPatch to work smoothly in your environment.

  1. Examine and optionally modify the Windows Update settings in BatchPatch. Go to Tools > Settings > Windows Update. In the Server Selection field, select the location you want target computers to search for updates. Selecting Default / Managed will instruct target computers to search for updates in whatever location they are already configured to search. This can be your local WSUS server or Microsoft’s public update server. If you instead select Windows Update or Microsoft Update, target computers will ignore/bypass their own configurations and instead search Windows Update or Microsoft Update. Windows Update includes only operating system updates. Microsoft Update includes operating system updates plus updates for other Microsoft applications. Note, before you can use Microsoft Update you must opt-in to the service. Use Actions > Windows Update > Opt-in…, which is equivalent to manually launching the Windows Update GUI on each target computer and opting-in to the Microsoft Update service.
    BatchPatchWindowsUpdateSettings
  2. Add hosts to the BatchPatch grid using File > Add hosts…
    BatchPatchAddHosts
  3. Highlight the host(s) and select the desired action. For the sake of this example let’s assume we want to download and install updates and then reboot the target if a reboot is required to complete the updates installation. So, we select Actions > Windows Updates > Download and install updates + reboot if required
    BatchPatchWindowsUpdateActionMenuItem

Using BatchPatch in ‘Cached Mode’

$
0
0

When ‘cached mode’ is enabled, the computer that is running BatchPatch will download updates for all target computers directly to its local cache directory. Target computers will not individually download their own updates from Microsoft or a WSUS. Instead BatchPatch will distribute updates to target computers from its cache. The advantage of ‘cached mode’ in this case is that it can save internet bandwidth if updates are being downloaded from Microsoft’s public server. The reason for the bandwidth savings is because BatchPatch will download only one copy of each update, which it can then distribute infinitely to target computers, rather than needing every single target computer to download its own copy of each available update.

‘Cached mode’ can also be used in conjunction with ‘offline mode’, which enables an administrator to apply Windows Updates to computers that don’t have internet access or access to a managed update server such as WSUS. For more on ‘offline mode’ usage, please see: Using BatchPatch In ‘Offline Mode’ When BatchPatch Has Internet Access and Using BatchPatch In ‘Offline Mode’ When BatchPatch Does *Not* Have Internet Access

This tutorial demonstrates how to use BatchPatch in ‘cached mode’ to download and install updates on multiple computers. In this example all computers are required to have internet access. The computer that runs BatchPatch will instruct all target computers to perform an online search for updates. The list of available updates from each target computer is transferred back to the BatchPatch computer, and then BatchPatch downloads a single copy of all available updates to its local repository. After it downloads the updates, it copies them to the target computers and initiates the installation process.

  1. Enable cached mode. Go to Tools > Settings > Windows Update, and then check the box to enable cached mode. Also set the Local update cache directory to a folder on your computer that has enough free space to store numerous Windows Update files. The amount of space required completely depends on how many updates need to be applied to target computers, the size of each update, the number of different operating systems you are deploying to, and whether or not you choose to retain cached files after they have been distributed to target computers. When cached mode has been enabled, an indicator is placed in the upper-right corner of the BatchPatch window.
    BatchPatchToolsSettingsWindowsUpdateCachedMode
  2. In the same Tools > Settings > Windows Update window, also take note of the Server Selection option. When cached mode is enabled but offline mode is disabled, target hosts will perform an online search for updates against the selected server. The target hosts will then report back to BatchPatch with their lists of available updates. BatchPatch will then download the updates from the same location that is configured in the Server Selection setting.
  3. Add hosts to the BatchPatch grid using File > Add hosts…
    BatchPatchAddHostsCachedMode
  4. Highlight the host(s) and select the desired action. For the sake of this example let’s assume we want to download and install updates and then reboot the target if a reboot is required to complete the updates installation. So, we select Actions > Windows Updates > Download and install updates + reboot if required
    BatchPatchDownloadAndInstallUpdatesCachedModeMenuItem
  5. I have included a series of screenshots below to show the whole process. Upon completion we have the overall content logged to the ‘All Messages’ column, with detailed information in the ‘Local Agent’ and ‘Remote Agent’ logs. In this case the local agent was responsible for downloading updates to the cache directory and then copying the updates to the target machine. The remote agent was responsible for moving the updates into the Windows Update cache and then installing the updates on the target host. In the final screenshot below we can see the ‘All Messages’ log content. I have not included screenshots of the other local or remote agent logs simply because they are too large to view in a meaningful way within a small screenshot.
    BatchPatchCachedModeSearching
    BatchPatchCachedModeDownloading
    BatchPatchCachedModeCopying
    BatchPatchCachedModeCaching
    BatchPatchCachedModeInstalling
    BatchPatchCachedModeDownloadInstallRebootAllMessagesLog

Using BatchPatch In ‘Offline Mode’ When BatchPatch Has Internet Access

$
0
0

When ‘cached mode’ is enabled, the computer that is running BatchPatch will download updates for all target computers directly to its local cache directory. Target computers will not individually download their own updates from Microsoft or a WSUS. Instead BatchPatch will distribute updates to target computers from its cache. The advantage of ‘cached mode’ in this case is that it can save internet bandwidth if updates would normally be downloaded from Microsoft’s public server. The reason for the bandwidth savings is because BatchPatch will download only one copy of each update, which it can then distribute infinitely to target computers, rather than needing every single target computer to download its own copy of each available update.

‘Cached mode’ can also be used in conjunction with ‘offline mode’, which enables an administrator to apply Windows Updates to computers that don’t have internet access or access to a managed update server such as WSUS.

This tutorial demonstrates how to use BatchPatch in ‘offline mode’ to download and install updates on multiple computers. In this example the computer that runs BatchPatch is required to have internet access, but target computers do not need internet access (Note, BatchPatch can also operate in ‘offline mode’ when none of the computers, including the BatchPatch computer, have internet access. Please see here for more info: Using BatchPatch In ‘Offline Mode’ When BatchPatch Does *Not* Have Internet Access).

In this tutorial, the computer that runs BatchPatch will instruct all target computers to perform an offline search for updates against the offline scan file that Microsoft publishes monthly. The list of available updates from each target computer is transferred back to the BatchPatch computer, and then BatchPatch downloads a single copy of all available updates to its local repository. After it downloads the updates, it copies them to the target computers and initiates the installation process.

  1. Enable cached mode and offline mode. Go to Tools > Settings > Windows Update, and then check the box to enable cached mode as well as the box to enable offline mode. Also set the Local update cache directory to a folder on your computer that has enough free space to store numerous Windows Update files. The amount of space required completely depends on how many updates need to be applied to target computers, the size of each update, the number of different operating systems you are deploying to, and whether or not you choose to retain cached files after they have been distributed to target computers. When cached mode and offline mode have been enabled, indicators are placed in the upper-right corner of the BatchPatch window.
    BatchPatchToolsSettingsOfflineMode
  2. In the same Tools > Settings > Windows Update window, also take note that the Server Selection option is disabled/grayed-out. This is because when cached mode and offline mode are both enabled, target hosts will perform an offline search for updates against the offline scan file that Microsoft publishes each month. The target hosts will then report back to BatchPatch with their lists of available updates. BatchPatch will then download the updates from Microsoft’s public server according to the information provided in the offline scan file for each available update.
  3. Add hosts to the BatchPatch grid using File > Add hosts…
    BatchPatchAddHostsOfflineMode
  4. Highlight the host(s) and select the desired action. For the sake of this example let’s assume we want to download and install updates and then reboot the target if a reboot is required to complete the updates installation. So, we select Actions > Windows Updates > Download and install updates + reboot if required
    BatchPatchDownloadAndInstallUpdatesOfflineMode
  5. I have included a series of screenshots below to show the whole the process. Upon completion we have the overall content logged to the ‘All Messages’ column, with detailed information in the ‘Local Agent’ and ‘Remote Agent’ logs.

    The computer that is running BatchPatch will download the most recently published WsusScn2.cab offline scan file from Microsoft and then copy it to the target host.
    BPCopyingWsusScn2ToTarget

    BatchPatch instructs the target host to perform a search for available updates against the WsusScn2.cab file, which is why the target host does not require internet access to perform its search.
    BPSearching

    The list of available updates on the target host is copied back to the BatchPatch console, and BatchPatch proceeds to download the updates to its local cache directory using its own internet connection.
    BPDownloading

    Once the updates have been downloaded to BatchPatch’s local cache, BatchPatch then copies the updates to the target host.
    BPCopying

    After the updates have been copied to the target host, the target host must move the files to its Windows Update cache.
    BPCaching

    When the caching process completes, the installation is finally ready to be executed.
    BPInstalling

    After installation, the target host is rebooted and the process is complete.
    BatchPatchOfflineModeDownloadInstallRebootAllMessagesLog
Viewing all 261 articles
Browse latest View live


Latest Images